
|
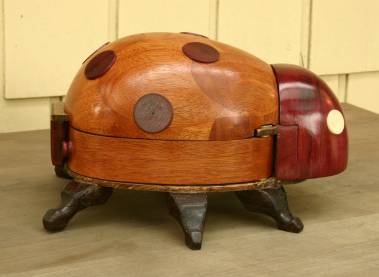
| Early February, and after three years, the project is finally done. If you have a broad-band connection, you might open a new window that has a stop-frame “movie” of the completed box. Click on the picture. |
It’s taken me a long time to get anywhere with this third box. I decided fairly early on that I wanted to make it in the shape of a ladybeetle, with two drawers that would swing out from under the elytra (the nonfunctional wings that make up the hard shell in shape of a dome).
Most of the structure is of birch, especially the drawers, whose curved sides I made by laminating two thin layers that I (very !) crudely steamed to form. I wanted to make the dome out of Osage Orange (Maclura pomifera), a North American tree whose wood is naturally rather yellow, and even bought some, but I made so many errors in constructing the dome that I made of this wood that I gave up and decided to do this part of the construction in Mahogany. Reddish brown will just have to stand in for orange.
Pass your cursor over any thumbnail to see it enlarged to the right; click there to get a large-sized picture.
Just why I couldn’t get down to work on this all Spring or for most of the Summer, I don’t know. Before the fallow period started, though, I decided that I wanted to put a Mahogany veneer on the sides of the drawers so that their visible surface would match the dome more precisely. I investigated the possibility of buying veneers, but it seemed impractical to buy as small a quantity as I’d be using. So I made some veneer, .020″ thick, by the simple expedient of planing down some slices of stock that I had glued with artist’s rubber cement to a rigid backing.
|
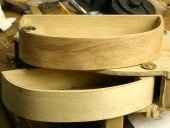
Today I finally got around to making the attempt to put one of the sheets of veneer onto a drawer. I steamed the sheet and got it in roughly the right shape, glued it on, and after a decent wait, sanded the excess glue away. There you can see it above the other drawer, and you can easily see the contrast between the color and the grain, with, as you’d expect, the underlying Birch being much finer in grain than the Mahogany. (13 Aug, ’06) |
|
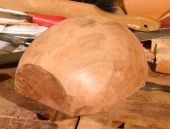
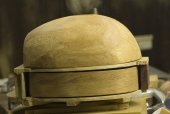
The second veneer went on with rather better results than the first, and it was now time to move on to the next piece of unfinished business. In the past week, I've glued two pieces of Mahogany to the main dome, and today, I finished the roughing out with rasps. Next job will be to fit the dome onto the base, with its drawers. (23 Aug, ’06) |
|
I’ve cut the dome down by removing 1 cm from the bottom; now I have to cut away the layer it’s sitting on and recess the bottom of the dome in a matching way so that the dome drops down to meet the drawers below. It’ll be rather tricky, but the idea is for there to be only a slight gap between drawers and dome, except at front and rear. (27 Aug, ’06) |
|
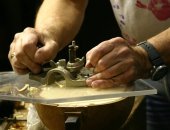
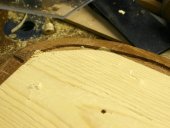
The next step has been to cut back the flat sheet (the roof) that the dome rests on, and recess the base of the dome itself so that it can drop down about ¼ inch. This picture and the next show the process at an early stage. (6 Oct, ’06) |
|
In the picture above, I'm using a router plane, a tool I’ve had for at least 25 years but never used till now, augmented with a clear plastic base to make the whole tool rest on the lip of the dome. In this picture, you can see the results so far. (6 Oct, ’06) |
|
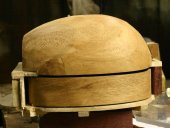
Recessing the dome is slow work indeed. But here, I tried seeing how the dome was beginning to look when sitting above the drawers. It’ll have to be cut back some, since it overhangs in places, but in a few weeks after we get back, I should be able to go on to the next steps. (9 Oct, ’06) |
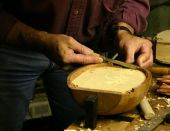
|
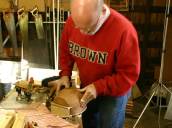
Home from Spain, I’ve resumed work. Not too much recessing remains to be done: just a couple of millimeters at most. Here I’m cleaning up the inside surface of the lip with a gouge. (18 Nov, ’06) |
|
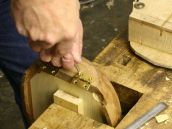
After more planing away, it’s looking like the dome is a pretty good fit. A few more adjustments and I can start worrying about attaching the dome to the base with hinges, and trimming everything so there are no overhangs. (30 Nov, ’06) |
|
There seemed no reason to mortise the hinges into the dome and the base; this made installing them considerably easier, too. Here I’m attaching the hinges onto the dome with temporary wood screws. Later, when the dome is hollowed out, the hinges will be attached with machine screws that are held in place by nuts inside the dome. (12 Dec, ’06) |
|
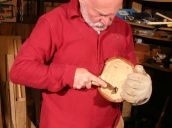
Mostly, I hollowed the dome out in the drill press, using a 1″ Forstner bit, which cuts fast and stays cool. Here, I’m smoothing out the inside, which still has a good half inch thickness of pine, using a scorp that I recently ordered from Woodcraft. (19 Dec, ’06) |
And now for the last or almost-last part of the construction, the fore-piece of the Ladybeetle, the part that the entomologists call the pronotum. Now that the dome is pretty well fitted to match the drawers below, this is the big challenge. I’ve always known that I’d use Purpleheart, the same wood used for the pulls and the feet of the miniature chest. The only other choices for a naturally dark wood would have been Ebony and Rosewood, both of which are far too hard, too difficult to work, and too costly. Not that Purpleheart is as cheap as Pine or even Mahogany! And it’s not soft, easy to work, or of low density, either. I had already bought a couple of blocks of it, which I glued together, and I’ve made a rectangular cut into it so that it’ll sit right on the ledge that’s in front of the dome.
It’s getting towards the end of January, and things are finally falling into place. In the first picture below, you see that I’ve installed little buttons as handles for opening the drawers. One of the drawers has even received its first coat of tung oil, and you can see what a difference it makes in the color. The dome will be approximately that color, too. Among other things I’ve gotten out of the way are: placing six spots on the dome and two on the pronotum; drilling four 7/8″ holes into the pronotum, partially to lighten it (it’s really heavy!) and partially to furninsh additional storage space in the piece. These holes will be threaded, and will have threaded plugs to keep the treasures from falling out. Also, I’m most of the way to making the legs for the piece. You see four of them to the right of the drawers. I know, they look more mammalian than insectile, but they do need to be pretty sturdy. And of course since she’s an insect, she needs six of them. I expect to get the remaining two roughed out by midweek.
Return to the woodworking page; to my home page.