|
|
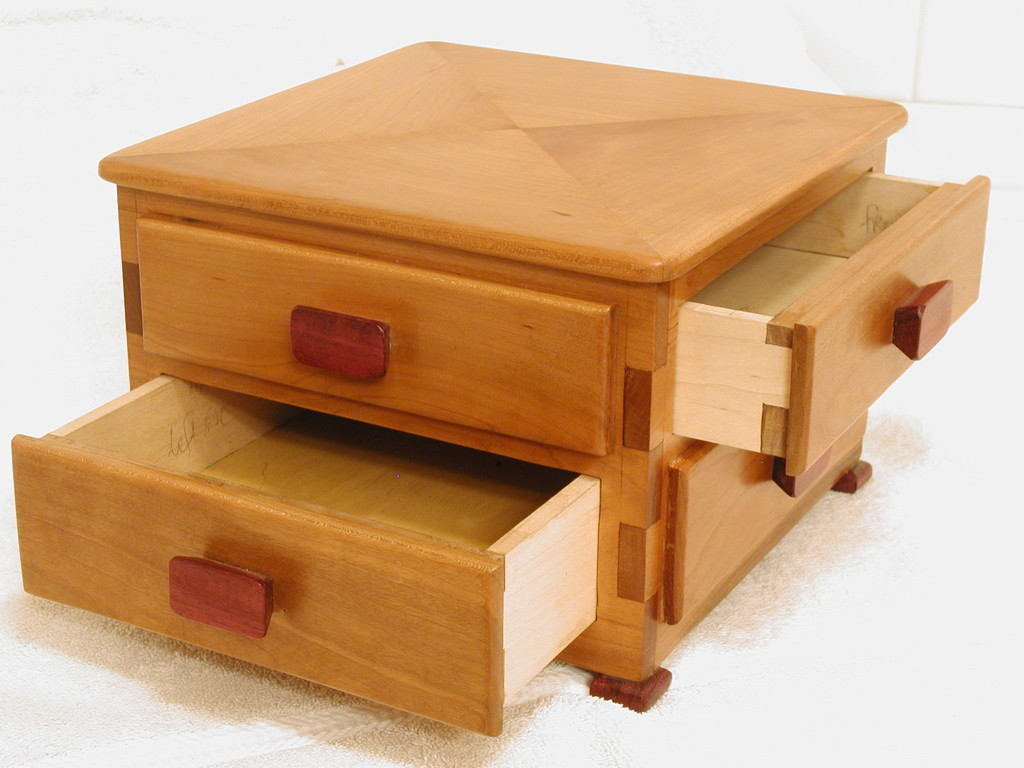
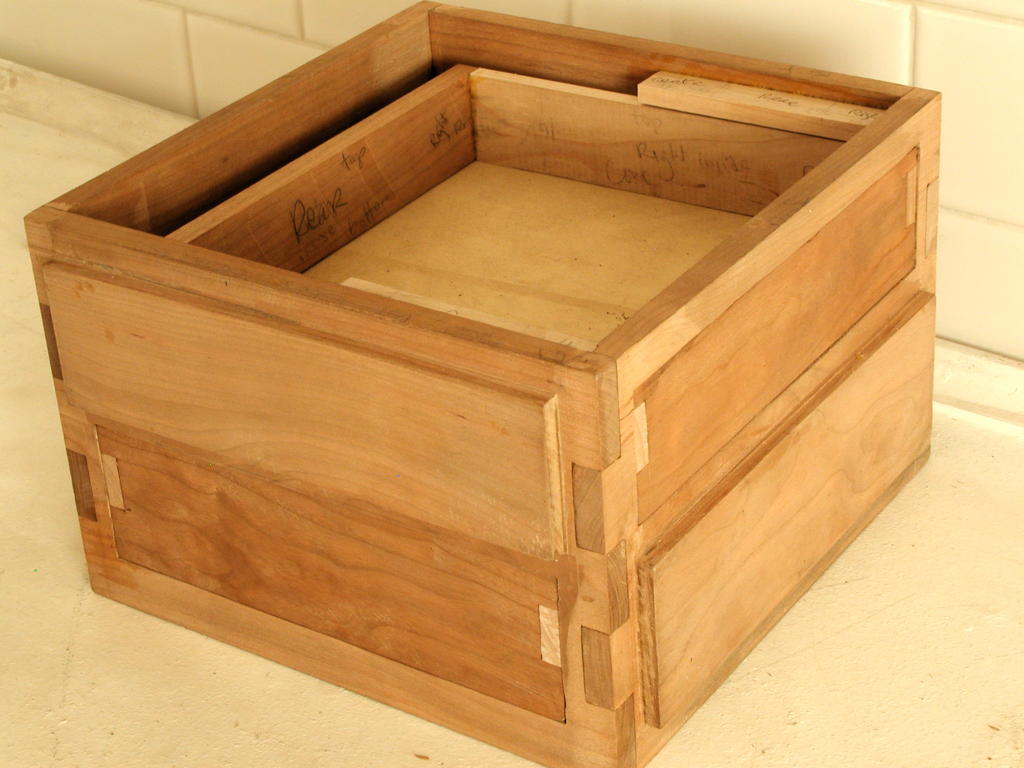
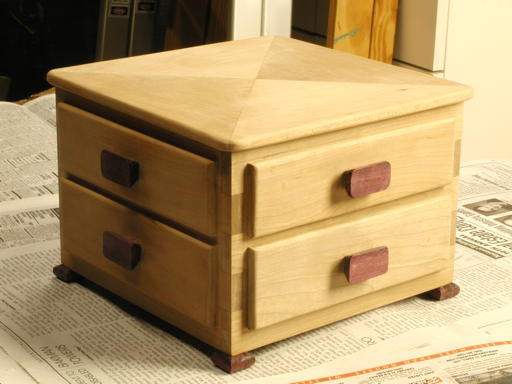
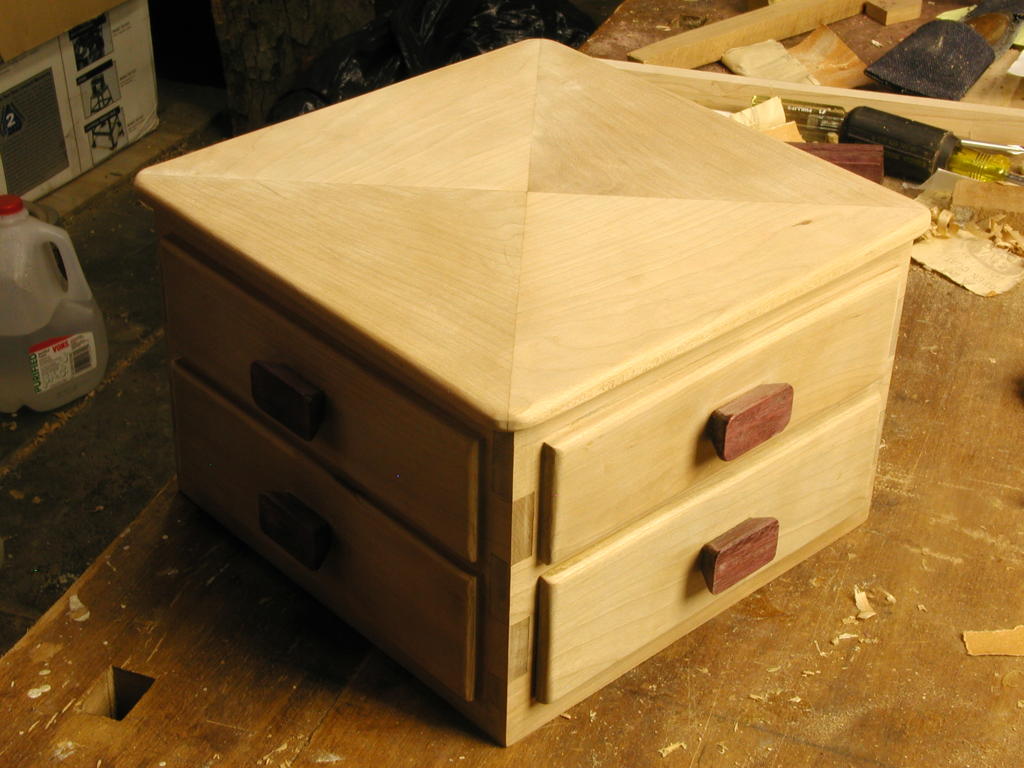
The finished box, showing its falsity to all (for a bigger version, click the picture) |
A box in the form of a miniature
chest of drawers, but
with a puzzle twist
For the twins, Devlin and Harris, I would need to present two boxes simultaneously, or at most ten minutes apart, at any rate. But not two identical boxes! The first of the two, I decided, should be a miniature chest, but with false fronts and false drawers. There is a rear side, completely blank, and three “front” sides: left, fore, and right. The two genuine drawers are on the fore side and the right side, while the left side has only the two dummy drawers.
My over-all plan was to make the drawers first, then the carcase, then apply the front panels to the drawers, then make the top, and finally take care of the decorative details like the drawer-pulls and the feet. At the beginning, I did not know how I was going to make the puzzle mechanism, but this came naturally as I progressed.
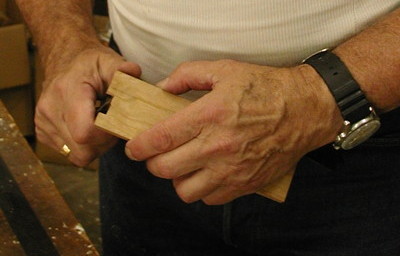
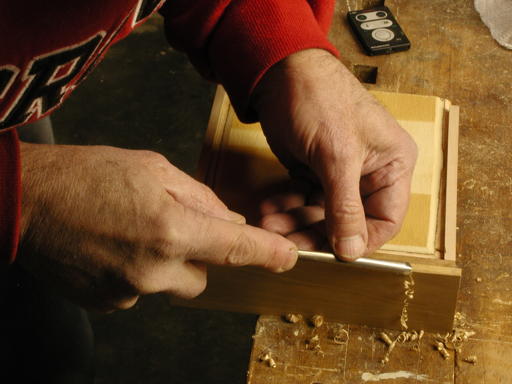
By the time I started photographing my progress on this project, I had already made a plan for the whole, detailed enough that I was well into the construction. This was August 2002. In those days (I’m writing these words more than 11 years later), I did not have enough skill to cut real dovetail joints, so I put everything together with plain finger joints. You see them in the top picture of this page, at the corner of the carcase; they’re made by making perpendicular cuts into the board. In the picture to the left, I’m using a sloyd knife to trim the void where the corresponding finger should fit—you can get a close-up by passing your mouse over the image.
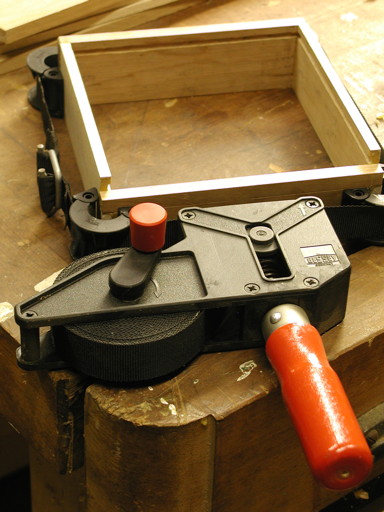
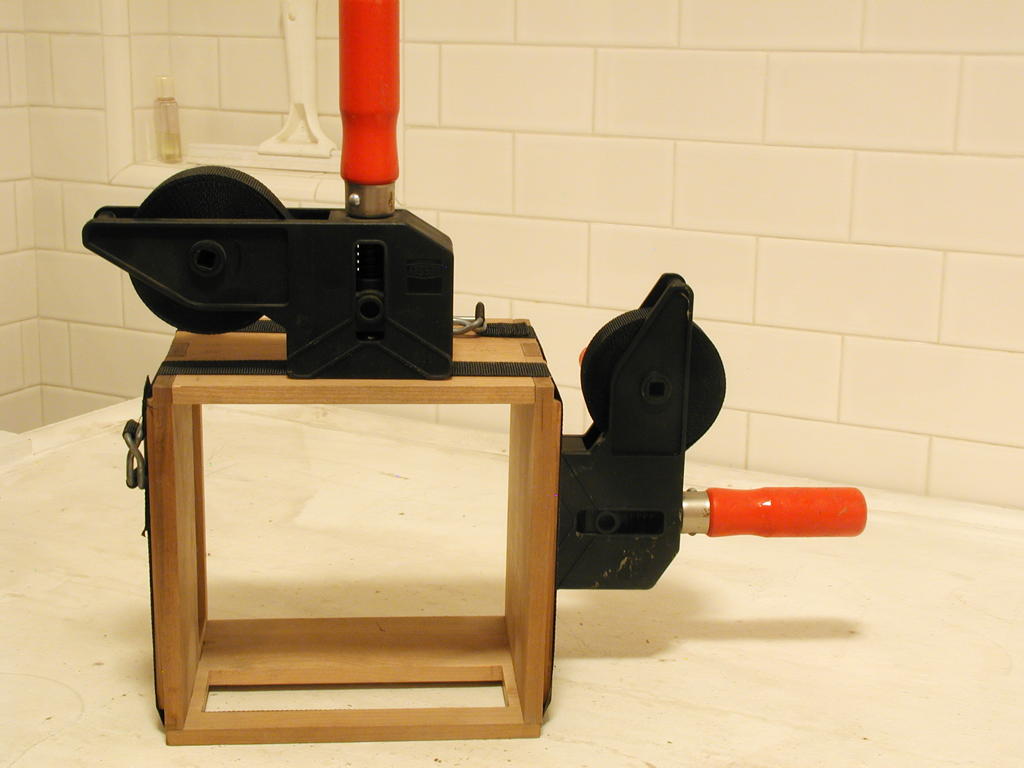
Drawer clamped during gluing (bigger; much bigger).
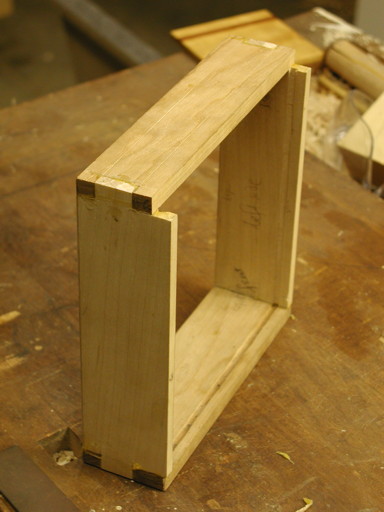
Drawer, glued up, on its side (bigger; much bigger).


Once the pieces were cut, the drawer had to be glued. In the pair of pictures to the right, the left-hand one shows the gluing process, the clamping effected with a strap-clamp. To tighten the strap around the box, you twist the red handle. In the right-hand picture, the gluing is done. You can see the finger-joint very clearly in the biggest version of the image. The groove going around toward the edge of the drawer was there to take the 1/8" plywood that I’d be using for the bottom of the drawer.
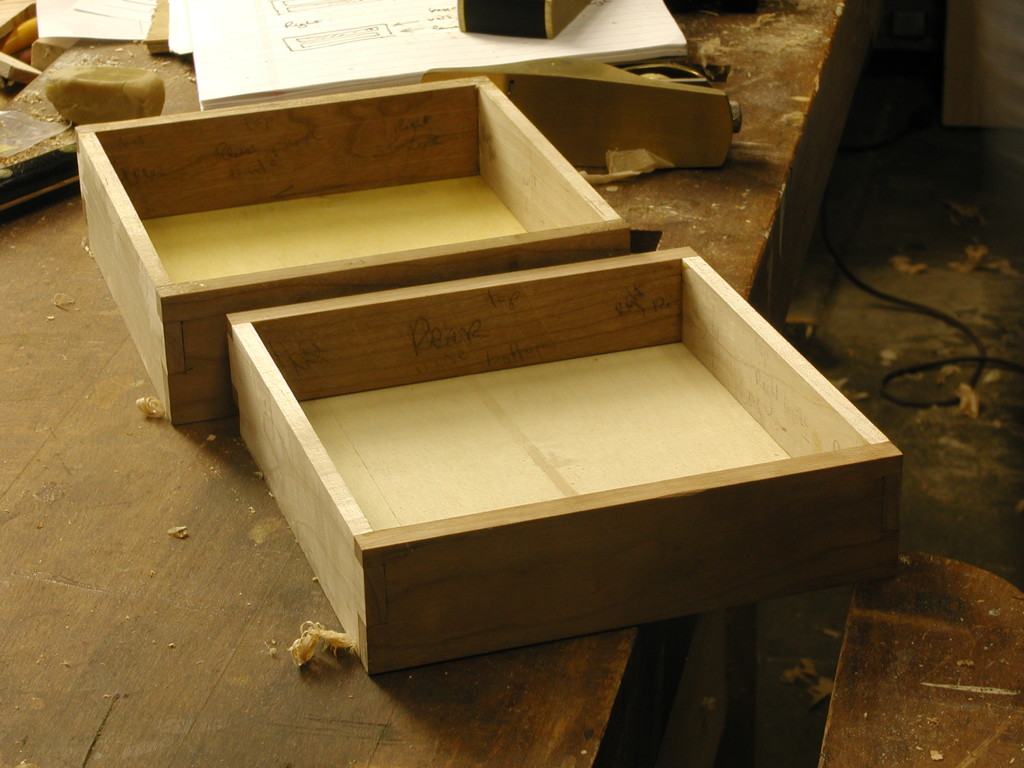
On the left, two pictures of the almost-completed drawers: upper (bigger image, much bigger), and lower (bigger image, much bigger), the lower one showing how the floor of the drawer slips in (or out). As I recall, the floors are held in place simply with a single brad. With the drawers out of the way, and with the knowledge of their precise size, I could now build the carcase.


Grooves sawn into a face-board (bigger; much bigger).

Using a plane to cut the rabbet (bigger; much bigger).
The box itself, or carcase, would be all of cherry, unlike the drawers, on which the sides were of maple, with only the front and back of cherry. Since I wanted the chest to have a perfectly square footprint, I needed four little boards, all of identical size. At the right you see the boards clamped together for the planing, most of which is done, but on the upper surface you see that with the rough sawing, they need to be trimmed there.
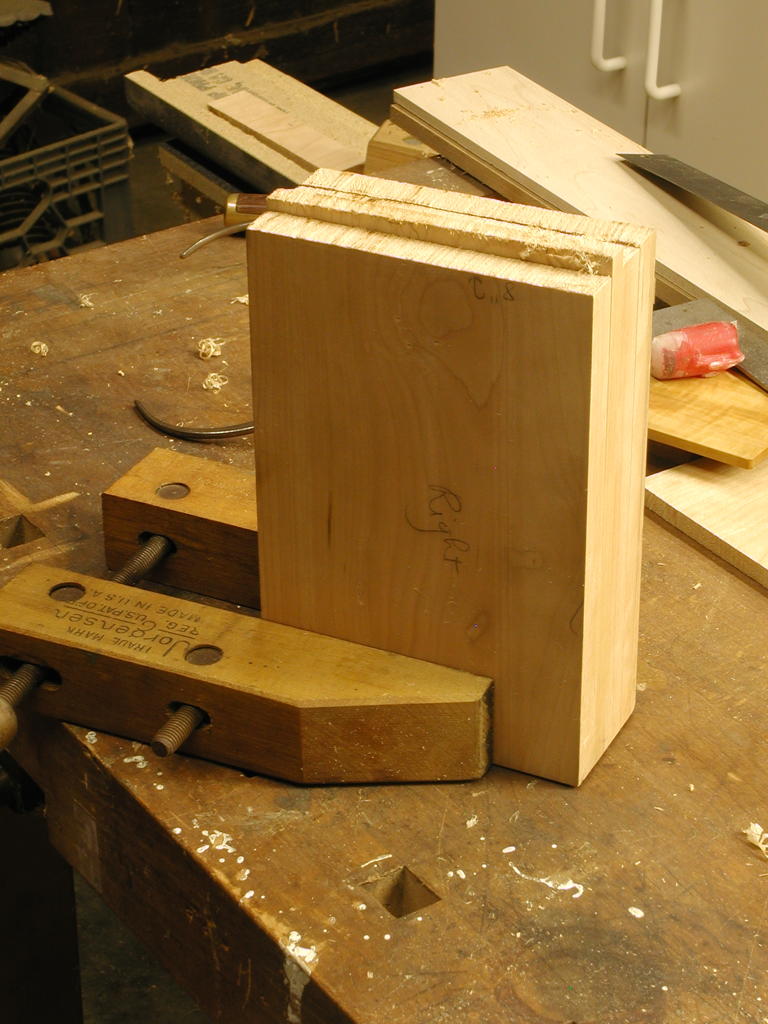
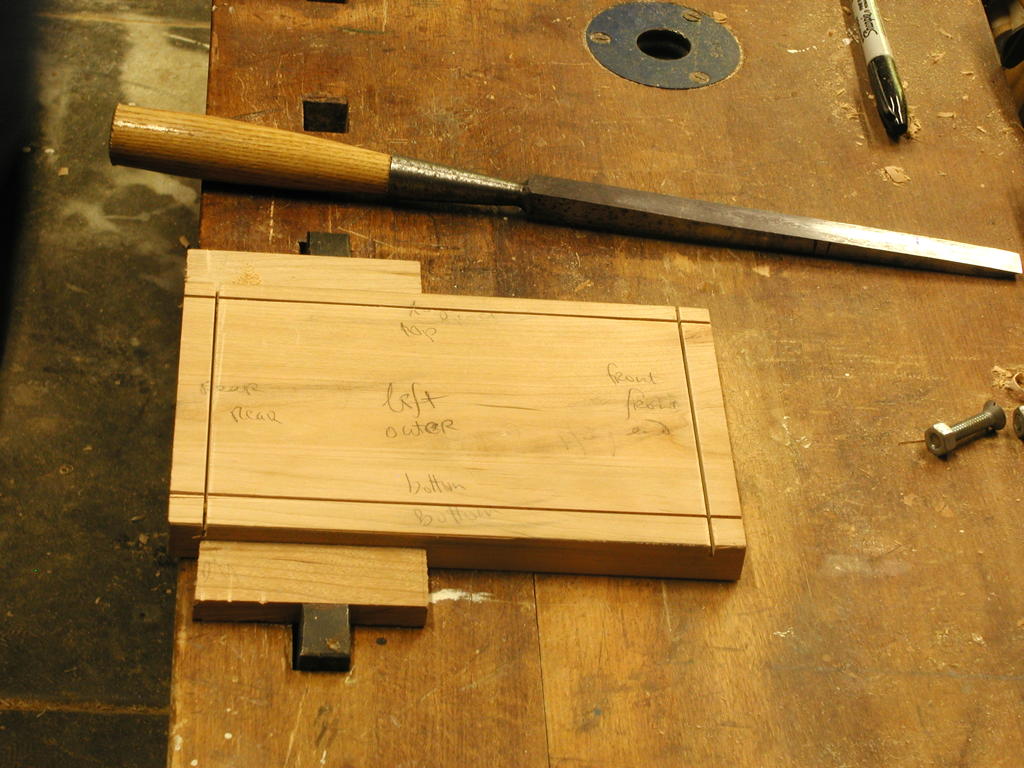
Once the four sides were at their finished size, there was more work to be done on the three that would show: left, fore, and right. In particular, my plan was that the four dummy drawers (two on the left, one on each of the other sides) would not be applied to the plank, but be integral to it. This meant cutting away the wood that was not supposed to represent the drawer. To do this, I first cut saw-kerfs at the proper depth and proper distance from the edge, so that I would have proper guidance when I used a rabbet-plane to cut the wood away. You see these kerfs, or grooves, in the upper picture to the left. The planing you see in the lower picture.
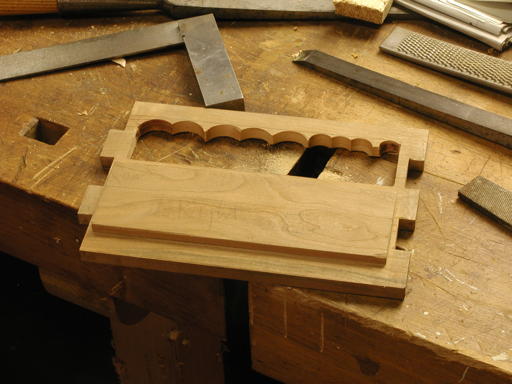
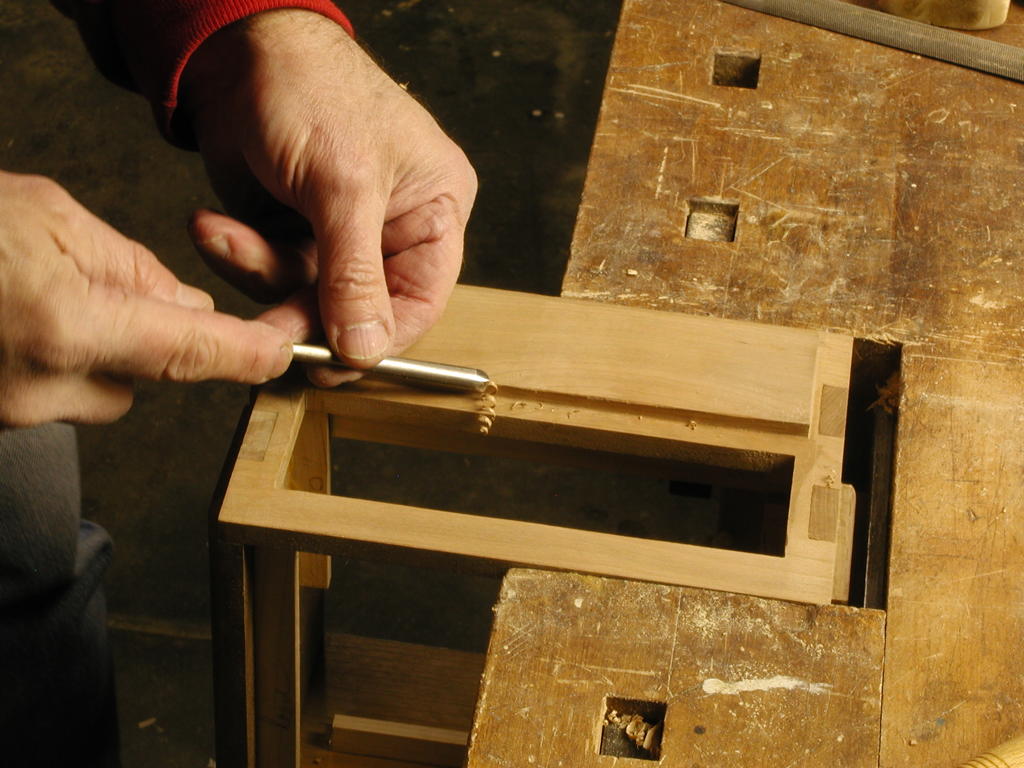
Three months later, in January 2003, I had already cut the finger joints, and pierced the front and right faces for the drawers that would set into them. The quickest way to rough out the holes was with a Forstner bit in the drill press; then the jaggies would need to be smoothed away with chisel and wood-rasp. That’s the right face over there to the right, with the hole mostly cleaned up.
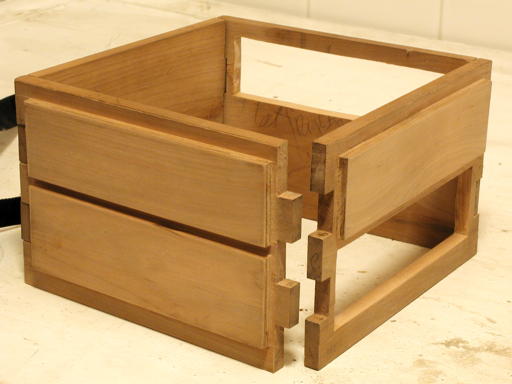

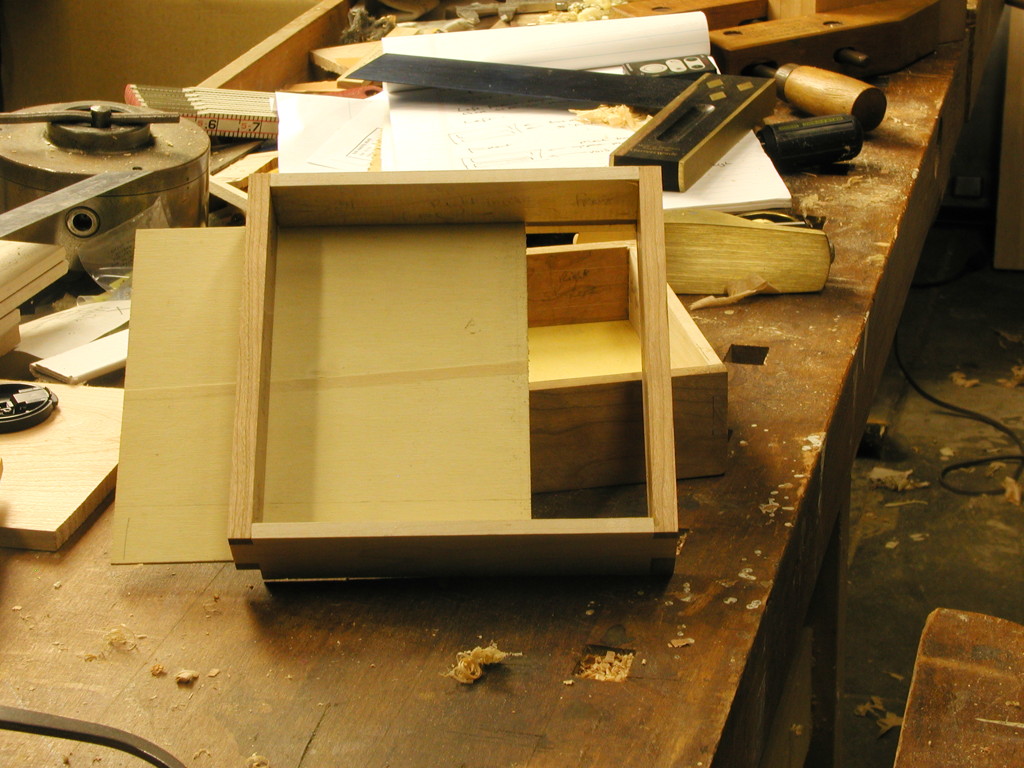
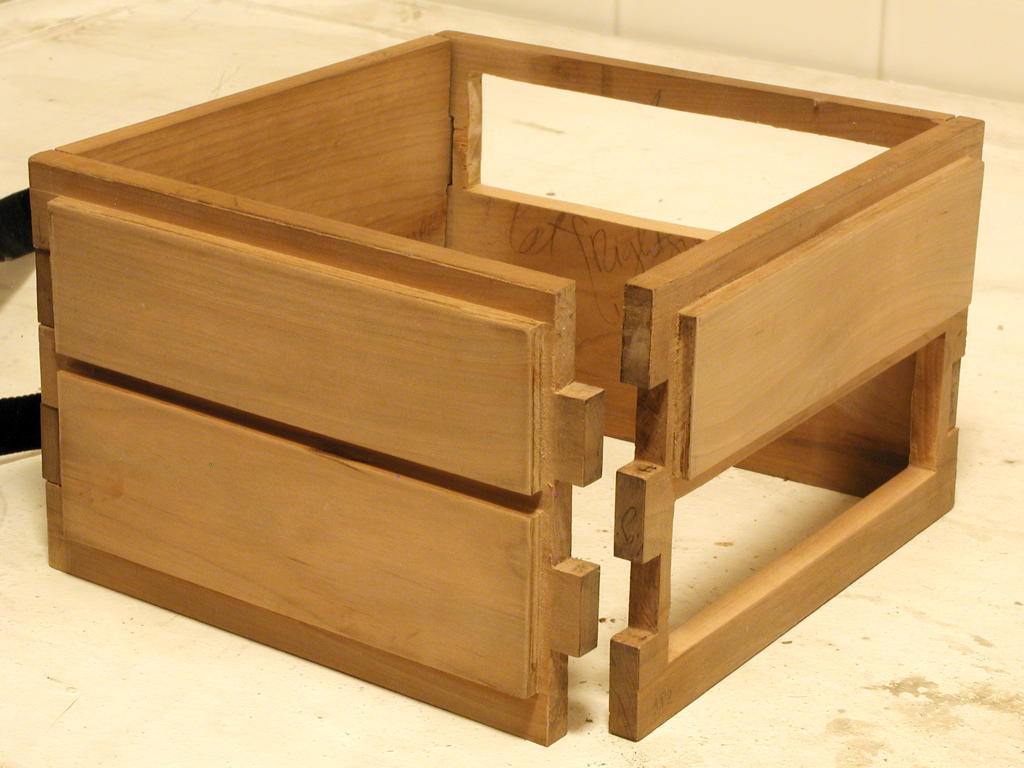
Now the four faces were done, and they needed to be glued together. The upper picture to the left is one that I took to show how everything would fit together, and slightly pulled apart for the demonstration’s sake. You see the finger joints at the fore-left corner opened up, and you can look through the two openings for the drawers. Now the box was ready to be glued. (Bigger image; much bigger.)

Below that, you see how I tried out the strap-clamps that would be holding the box in place for the gluing. This was actually before I even opened up the glue-pot, but I wanted to be ready when the time came, and not prone to careless time-consuming errors, since the glue starts to set up fairly fast, after about 15 minutes. Maybe I should say that the box is on its side only for the sake of photography: to minimize distorting forces on the box during the gluing, you put it upright then. (Bigger image; much bigger.)
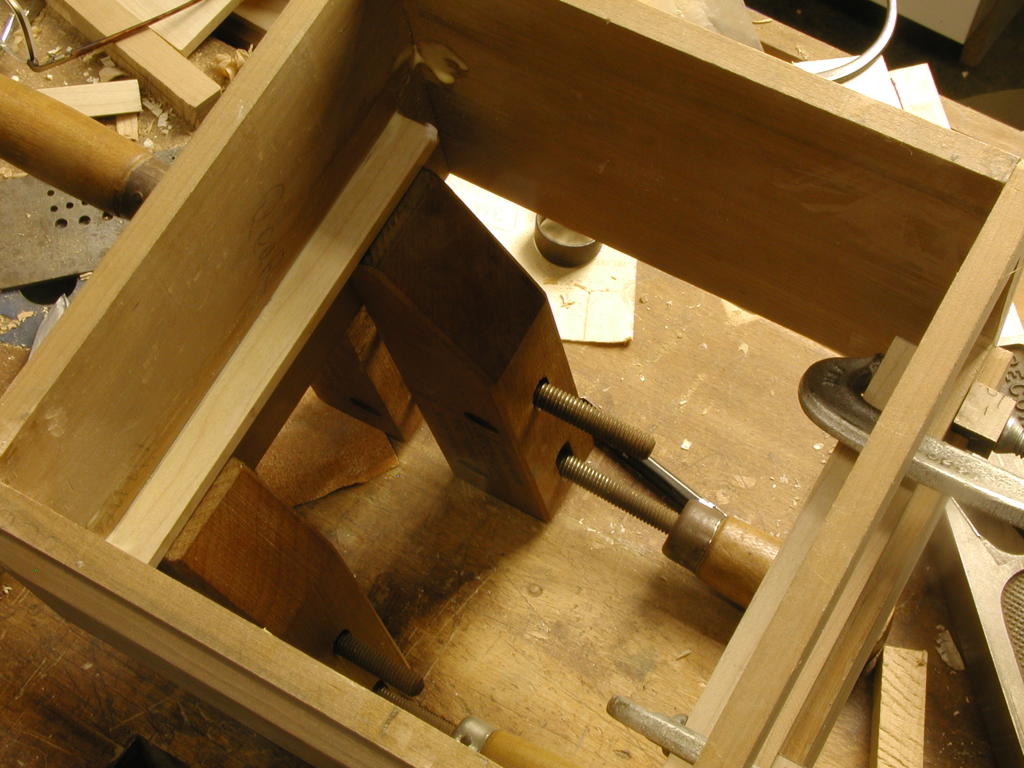
In the picture to the right, above here (bigger version, much bigger), it may be hard to understand what you’re looking at. But the rails, or guides, that the drawers will rest on and be held in place by are being glued into place. I think you’re looking into the bottom of the box, since the guides are L-shaped in cross section, with the vertical part glued against the wall, and the horizontal part standing as support for the drawers. You can see an unglued one when you pass your mouse over the thumbnail.

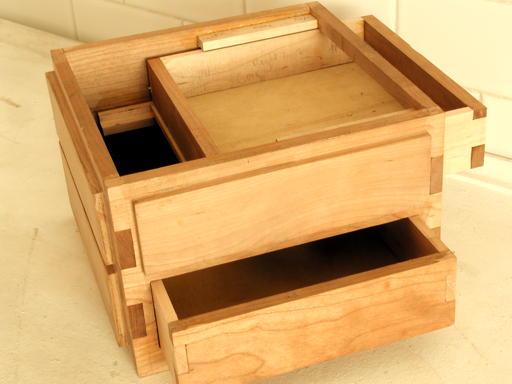
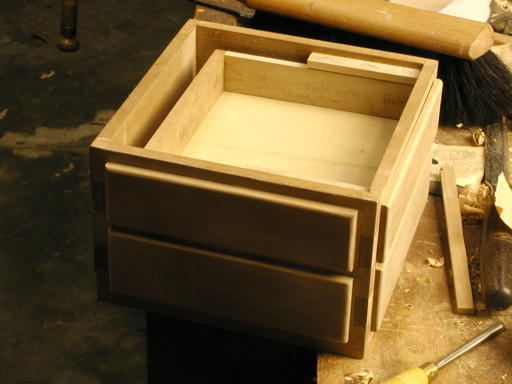
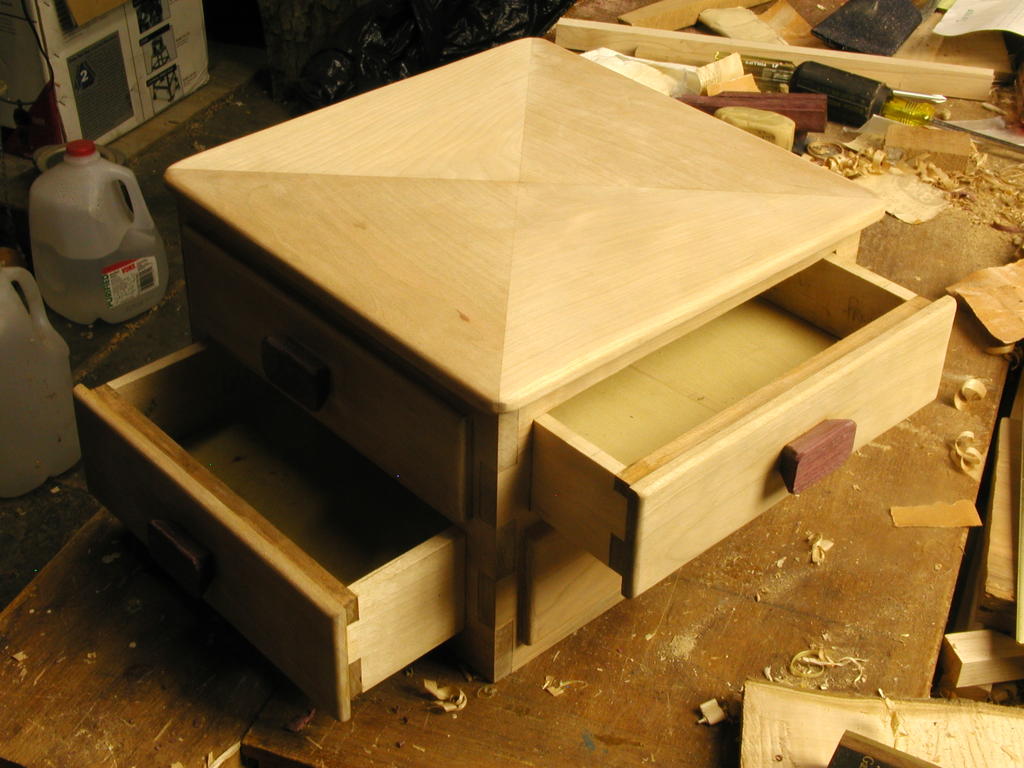
Now the drawers are in place, or at least their guide-rails are glued in. In the left-hand picture, notice that the drawers are flush to the main box, and do not yet mimic the false drawers, one below on the right face and one above on the fore face. The other thing to notice is that there is a guide-rail above to prevent the drawer from pivoting down when it’s pulled out (bigger image, much bigger).
In the right-hand picture, both drawers are pulled out, and you can see (but unfortunately not too well, even in the mouse-over close-up) how the drawer sits on the L-shaped lower rail (bigger image, much bigger).
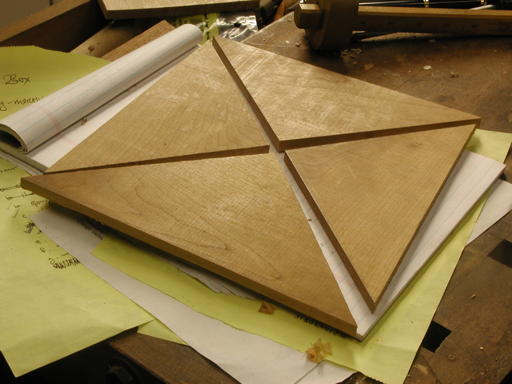

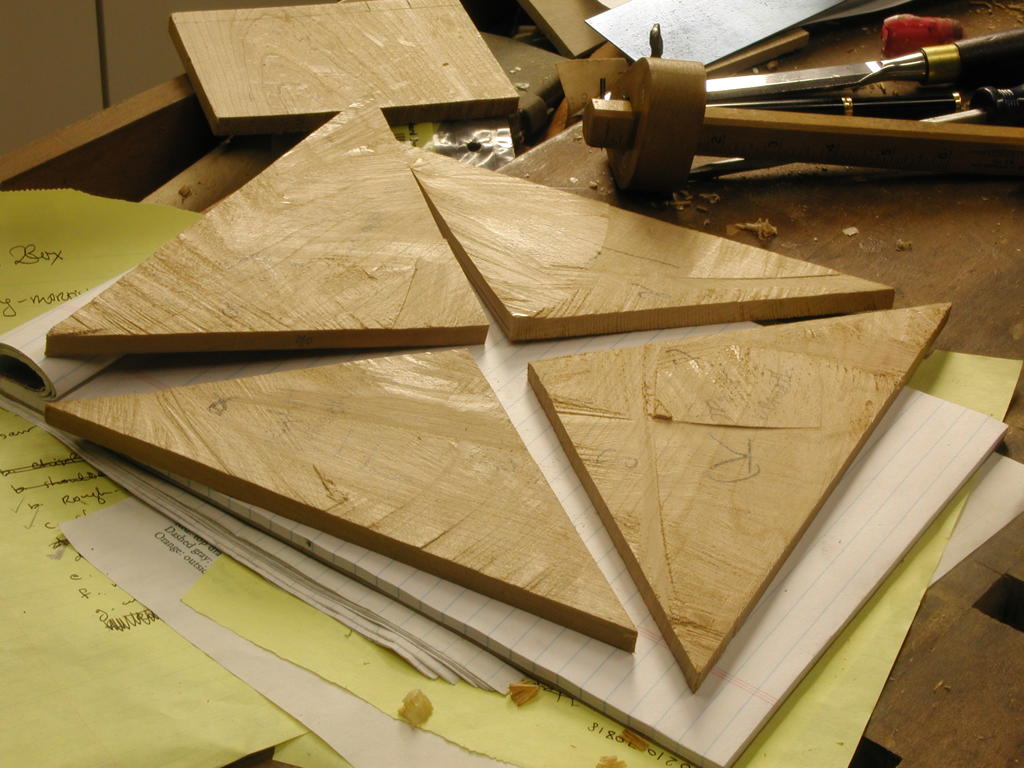
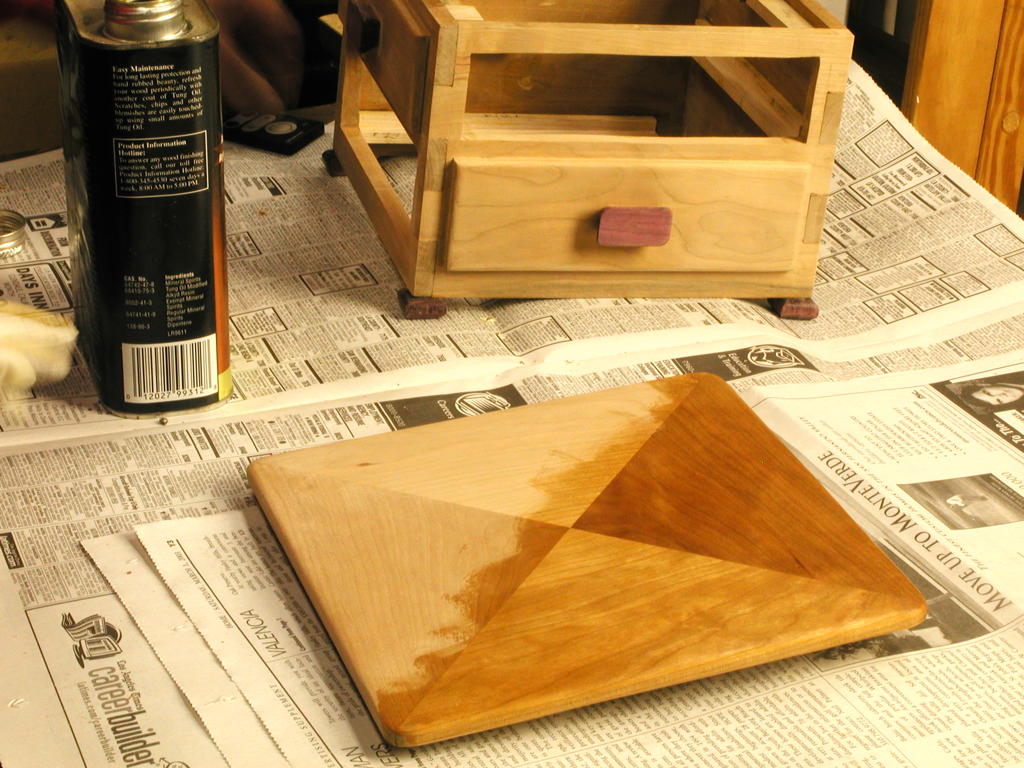
The next step was to construct the top of the little chest. Unfortunately, I can not for the life of me recall the particular steps I went through to get the four pieces that you see in the pictures to the left. Ordinarily, I would have taken a thick piece of wood in the form of one of the triangles you see, make sure it was precisely 45°-90°-45°, then saw it into two halves, glue them together edge to edge to again give a triangle of that shape, then plane both faces and the edge where the seam hit midway, and saw again, replane, and make sure the edges with the seam are perfectly straight, and reglue to get a square. This method would never pass through a stage like what’s shown here.
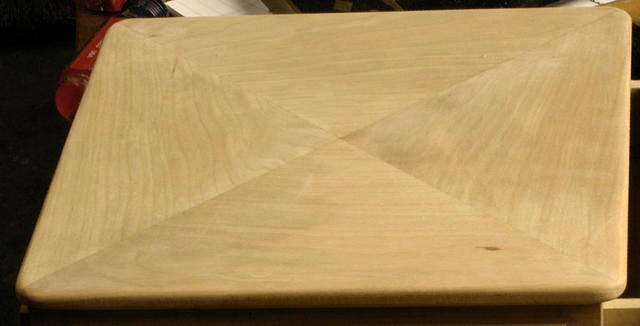
At any rate, after the gluing together of those four pieces, planing the faces, trimming up the edges, and rounding the corners, what I got was the piece shown at the left. Even though in later years the seams have opened up a little, I still think that it was very successful, especially since the final oil-finishing brought out the varying direction of the grain in the four pieces.

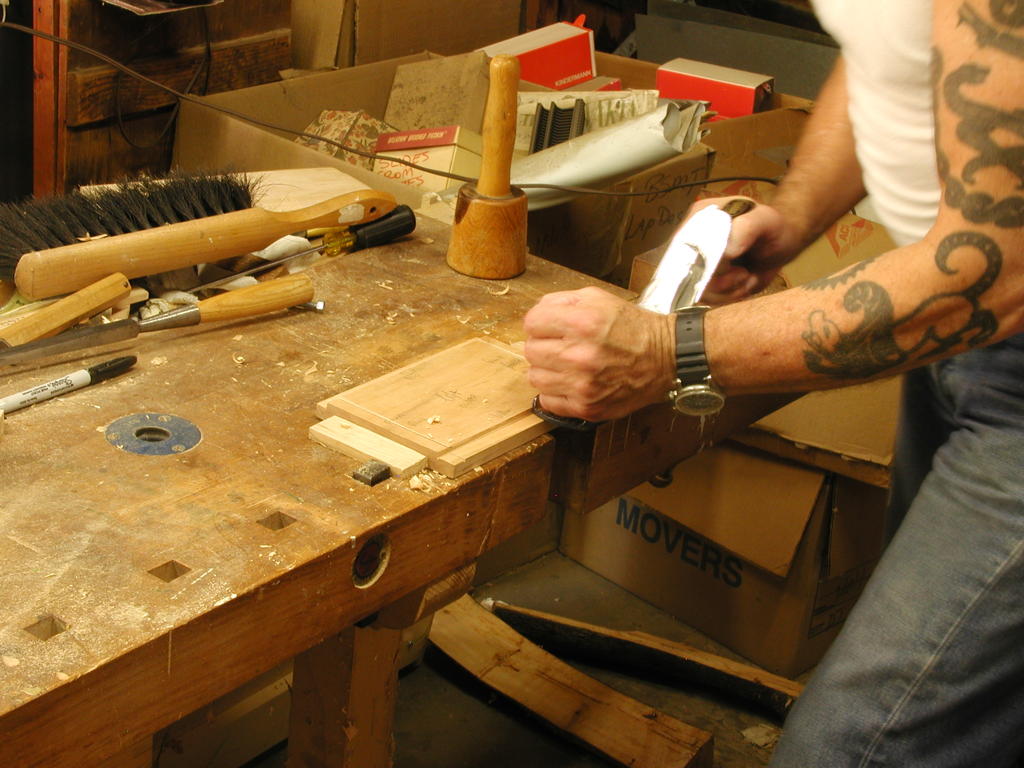
All the edges of the drawers had to be rounded. To the right, two shots of this action on the drawers, both a real one on the left, and a false one on the right. The edges of the top-board had already been rounded, and I guess that I must have made a decision to leave the corners sharp on the carcase itself.
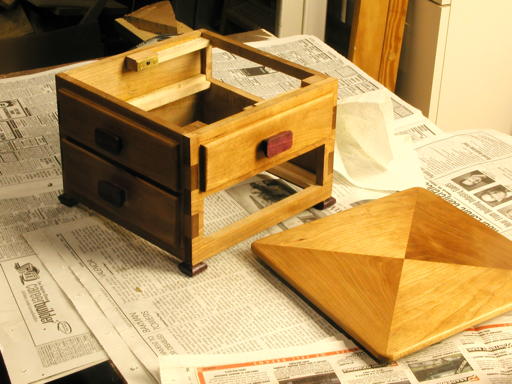
Not much to say about the pictures in the block below, beyond what the captions convey. But the top had to be removable, for adjusting the secret device that hindered opening the chest, or even disabling the device. I decided on a simple set screw that when advanced would run up against a sloped block on the top. One needs an Allen key of just the right size to turn the screw.
The drawer-pulls and the feet are of Purpleheart (Peltogyne sp.), a nice South American wood from trees that are, of course, endangered. Very hard and difficult to work, but still attractive, especially for accents, as here.
|

|

|
|
All edges rounded, but the drawer handles need to be attached (bigger image, much bigger). |
Now the handles are attached (bigger image, much bigger). |
Same as the image to the left, but with the drawers pulled open a bit (bigger image, much bigger). |
|

|
|
|
The feet are on, and it’s ready for oiling (bigger image, much bigger). |
The top is oiled halfway, to show the effect of the finish (bigger image, much bigger). |
All oiled, and the mechanism for holding top on is installed (bigger image, much bigger). |
| A stop-frame movie of the finished chest, should play on all browsers (30-second clip). |